Every metal have its own physical, chemical and mechanical properties. Brittleness, Creep, Ductility, Elasticity, Fatigue, Hardness, Malleability, Plasticity, Resilience, Stiffness, Toughness, Yield strength are the some mechanical properties of metals. In this post I am specifically going to talk about Hardness.
Hardness
A material’s ability to withstand friction, essentially abrasion resistance, is known as hardnesscutting tool would break apart if specimen have a more hardness than tool itself. That's why drill bits and cutting tools are made of hard metals, harder than the specimen.
More Hardness Doesn't Mean More Strength
Glass have a more hardness than steel in general. It is harder to scratch glass than the steel because glass have a higher hardness.Hardness in Steel
Steel is an alloy of iron and carbon. Iron have a very low hardness but addition of carbon increases the hardness of iron making it steel. Heat Treatment (hardening, case hardening) methods are used to add carbon in a iron, Following Iron-Carbon Diagram is showing how iron reacts on different percentages of carbon (click on link below to study more about Iron-Carbon Diagram)Hardness Testers
To measure hardness of metal, hardness testers are used. Different types of hardness testers are available. Rockwell Hardness Tester, Vicker Hardness Tester and Brinell Hardness Tester are the some types of Hardness testers.
Rockwell Hardness Tester
 |
| Rockwell Hardness Tester |
Rockwell is the most commonly used hardness tester. This method is used on almost all metals. Rockwell use two different types of indentors. Ball Indentor and Diamond Indentor . Ball indentor is a hardened steel ball usually used for soft metals like aluminum, Diamond indentor is used for steel and all other hard metals. Rockwell measures the permanent depth of indentation produced by a load on an indenter. First, a pre-load of 3 kgf-10 kgf is applied to a sample using a diamond or ball indenter. After holding the pre-load for a specific time the major load is applied to reach the total required test load. Different loads are applied on different type of materials, after specific time the load is removed using crank. The dial face on the top shows the result after removing the load. No formula is required in Rockwell tester it shows the result on dial face unlike brinell. Usually the HRC and HRB scales are used, for diamond indentor HRC (Hardness Rockwell C-Scale) is used and for Ball indentor HRC (Hardness Rockwell B-Scale) is used.
Brinell Hardness Tester
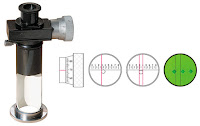
This method is usually used on low hardened materials like aluminum, copper and low carbon steel. Brinell Hardness Tester applies a 300 kgf-3000 kgf of load for a specific time of 10s-15s on a specimen. Indentor is made of Tungsten Carbide which shapes like a ball of 2.5mm-10mm in diameter. After the indentor penetrates.The dent is measured using microscope.
following formula is used to find the value of hardness,
BHN = Brinell Hardness Number
F = Load applied
D = Diameter of indenter
d = Diameter if dent


Comments
Post a Comment